Showing posts with label so saffron. Show all posts

Tuesday, 22 March 2022

Every Chapter

Every Chapter

All images © 1990-2022 Stampin’ Up!®


Supplies:
• Stamp Sets: Every Chapter (158017)
• Card Stock: Blushing Bride (131198), So Saffron (105118), Soft Sea Foam (146988), Balmy Blue (146982)or purchase the Subtles Assortment pack(146978), Thick Basic White (159229), Basic White (159276)
• Stamp Pads: Jet Black StazOn (101406)
• Tools: Bone Folder (102300); Paper Snips (103579)
• Miscellaneous: Stampin’ Blends in Smoky Slate (154904), Daffodil Delight (154883), and Balmy Blue (154830), Iridescent Rhinestone Basic Jewels (158130), Wink of Stella Clear Glitter Brush (141897), Stampin Dimensionals (104430), Multipurpose Liquid Glue (110755)


Measurements:

• Thick Basic White card base: 4-1/4” x 11”, scored at 5-1/2” and burnished with the Bone Folder
• Basic White: 3-1/2” x 4-3/4” and scrap about 1-1/2” x 3”
• Scraps of Blushing Bride, Balmy Blue, So Saffron, and Soft Sea Foam.


Instructions:

1. Taking care to center the stack of books image, stamp it onto the Basic White piece with Jet Black StazOn. Reink and stamp the teacup and glasses part of the image onto the Basic White scrap. Color image with Stampin’ Blends then cut out with Paper Snips.
2. Using the card image as a reference, stamp books image on Blushing Bride, Balmy Blue, So Saffron, and Soft Sea Foam scrapsCut out each full book with Paper Snips. Stamp the 2nd book, from the top, also onto Blushing Bride and cut out the flower. Stamp the bottom book also onto So Saffron then cut out the bookmark.
3. With Stampin’ Dimensionals, adhere the books and teacup parts directly on top of the stamped image on the Basic White piece then that piece onto the card front.
4. With Multipurpose Liquid Glue, affix the flower and bookmark.
5. Add Iridescent Rhinestone Basic Jewel to center of flower.
6. Brush design on teacup with Wink of Stella Clear Glitter Brush.

Continue Reading
No comments
Share:

Tuesday, 15 February 2022

Let’s Set Sail

Let’s Set Sail

All images © 1990-2022 Stampin’ Up!®


Supplies:


• Stamp Set: Let’s Set Sail (157900or discounted as a bundle with the Sailboat Builder Punch (157906)
• Card Stock and Paper: Crumb Cake(120953); Early Espresso (119686); Basic White (159276); Daffodil Delight (119683); So Saffron (105118); Granny Apple Green (146990)
• Stamp Pads:  Early Espresso Classic Stampin' Pad (147114); Coastal Cabana Classic Stampin' Pad (147097); Pool Party Classic Stampin' Pad (147107)
• Tools: Horizon Dies (157778); Tasteful Labels Dies (152886); Sailboat Builder Punch (157905) or discounted as a bundle with the Let’s Set Sail Stamp Set (157906)Mini Stampin’ Cut & Emboss Die Cutting Machine (150673)
• Miscellaneous: Rhinestone Waves Basic Jewels (159396)); Bakers Twine Essentials Pack (155475); Stampin’ Dimensionals (104430); Stampin’ Seal Adhesive (152813); Mini Glue Dots (103683); Fine Tip Glue Pen (138309)


Measurements:


• Crumb Cake: 5 1/2" x 8 1/2" scored at 4 1/4"
• Early Espresso: 1/4" x 4
• Basic White:  5 1/8” x 3 7/8”


Instructions:


1. Adhere the Early Espresso layer to the Crumb Cake card base
2. Use the water stamp from Let’s Set Sail and Pool Party Ink to stamp the ‘sea’ four times, overlapping and staggering each one – for a muted look like mine, stamp ‘off’ each time on a piece of scrap paper before stamping on your cardstock
3. Use a die from Horizon Dies to cut the ‘sand’ from So Saffron cardstock and adhere – use the grass die and Granny Apple Green cardstock to create the dune grass and adhere in place.
4. Use the sand die again to cut out a piece of Daffodil Delight cardstock – trim to size and adhere onto the grass with Stampin’ Dimensionals
5. Die cut the fence out of Crumb Cake cardstock, add a bow and adhere in place
6. Stamp the sailboat using Early Espresso Ink and the sails using Coastal Cabana Ink – use the Sailboat Punch to cut out the pieces – glue the boat in place and add the sails with Stampin’ Dimensionals
7. Stamp the seagulls at the left top and stamp the sentiment onto a scrap piece of white cardstock using Early Espresso Ink– cut out using a die from Tasteful Labels Dies and add to the card with Dimensionals
8. Add some Rhinestone Jewels and adhere to the Espresso layer

Continue Reading
No comments
Share:

Saturday, 15 January 2022

Rainbow of Happiness


Rainbow of Happiness

All images © 1990-2021 Stampin’ Up!®


Supplies:
• Stamp Sets: Rainbow of Happiness (157721);
• Card Stock and Paper: Bumblebee (CS) (153077); Basic White (CS) (1592760So Saffron (CS) (105118)Soft Sea Foam (CS) (146988); Balmy Blue (CS) 146982; Misty Moonlight (CS) (153081)
• Stamp Pads: Versamark Ink (102283);
• Tools: Brilliant Rainbow Dies (157726); Tasteful Texture Embossing Folder (152718)
• Miscellaneous: Stampin’ Emboss Powers Basic (155554); Heat Tool (129053); Paper Trimmer (152392); Paper Snips Scissors (103579); Adhesive Sheets (152334); Stampin’ Dimensionals (104430); Stampin’ Seal (152813); Stampin’ Cut & Emboss Machine (149653); Stampin’ Dimensionals (104430)Stampin’ Seal Adhesive (152813)

Measurements:

• Misty Moonlight: 8 ½  x 5 ½” Score at 4 ¼ ; 2 ¾ x ½ 
• Basic White: 3 7/8” x 1 ¼ (4)
• Bumblebee, So Saffron, Soft Sea Foam & Balm Blue: Scrap 3” x 3”
• So Saffron: 3 7/8” x ½ “

Instructions:

1. Cut a piece of Misty Moonlight 5 ½ “ x 8 ½ “ and score at 4 ¼ “ for the card base
2. Cut a piece of Basic White 3 7/8” x 5”
3. Cut a piece of Basic White 5 ½” x 4 ¼” and the adhere a large adhesive sheet to the back of it.  Die cut the large size cloud die from the Brilliant Rainbow die set. You need about 35 - 38 clouds. 
4. Randomly adhere the die cut clouds to the 3 7/8” x 5” piece of Basic White. When done cut four pieces out of the large piece. They will each be 1 ¼ “x 3 7/8”.
5. Adhere the four pieces of Basic White your created in step 4 to the card front as shown. Aligning the top and bottom piece to the top and bottom of the card base.
6. Die cut a rainbow out of Bumblebee, So Saffron, Soft Sea Foam and Balmy Blue. Use the adhesive sheets on the back of this paper if you wish.
7. Trace the rainbow die on Misty Moonlight and fussy cut out.
8. Adhere the individual (Bumblebee, So Saffron, Soft Sea Foam and Balmy Blue) rainbow pieces to the Misty Moonlight piece you fussy cut and adhere to front of card with Dimensionals. You will have extra rainbow pieces for another card or to decorate the inside and envelope. 
9. Die cut a few more clouds from Basic White and adhere to card base with Dimensionals or Stampin’ Seal.
10. Emboss the So Saffron piece with the Tasteful Textures embossing fold and adhere to card front with Stampin’ Seal. 
11. Stamp sentiment is Versamark ink and emboss with White embossing powder.
12. Cut a rectangle around the sentiment it should measure 2 ¾” x ½ “then adhere to card base with Dimensionals slightly overlaying the So Saffron piece above.


Continue Reading
No comments
Share:

Sunday, 26 December 2021

Art in Bloom

Art in Bloom

All images © 1990-2021 Stampin’ Up!®


Supplies:
• Stamp Sets: Art in Bloom (155085) or discounted as a bundle (158368)
• Card Stock and Paper: Night of Navy(100867), So Saffron (105118)and Basic White (159276), Sweet Symmetry 12” x 12” Designer Series Paper “DSP”(155605)
• Stamp Pads: Night of Navy (147110), Tuxedo Black Memento Ink Pad (132708)
• Tools: Bloom Hybrid (dies + folder)Embossing Folder (155989) or discounted as a bundle (158368); Stampin’ Cut & Emboss Machine (149653); Bone Folder (102300); Paper Snips (103579)
• Miscellaneous: Stampin’ Blends Combo Packs in Night of Navy (154891), Balmy Blue (154830)Daffodil Delight (154883); Bumblebee ¼” Gingham Ribbon (153658), Holiday Rhinestone Basic Jewels (150457); Multipurpose Liquid Glue (110755);Stampin’ Dimensionals (104430), Mini Glue Dots (103683)


Measurements:

• Night of Navy card base: 5-1/2” x 8-1/2”, scored at 4-1/4” and burnished with the Bone Folder4” x 5-1/4”, 3” x 3-3/4”
• Designer Series Paper: 2-3/4” x 3-1/2”
• Basic White: 3-1/2” x 4-1/2”, plus scraps for three leaves
• Ribbon: 12”


Instructions:

1. Emboss 4” x 5-1/4” Night of Navy cardstock with Bloom Embossing Folder. Adhere to card base with Multipurpose Liquid Glue. Adhere DSP to smaller Night of Navy piece.
2. Stamp the trio of flowers and two petals on Basic White with Tuxedo Black Memento ink. Color in center of flowers with Dark Daffodil Delight Stampin’ Blends marker. Color lines coming out of center with Light Night of Navy. Outline petals with Dark Balmy Blue and fill in with Light Balmy Blue. Do not color in petals. Die cut the three flowers and two petals.
3. With dots of Multipurpose Liquid Glue attach two petals to back of largest flower. Set aside to dry.
4. Stamp sentiment with Night of Navy ink then die cut.
5. Arrange flowers as desired then adhere to DSP piece with Stampin’ Dimensionalsthen attach whole piece to card front.
6. Fold ribbon, position at an angle, and adhere to DSP piece with Mini Glue Dots.Trim ends with Paper Snips.
7. Angle sentiment over ribbon and adhere with Stampin’ Dimensionals.
8. Sprinkle three Holiday Rhinestone Basic Jewels below sentiment.

Continue Reading
No comments
Share:

Saturday, 27 March 2021

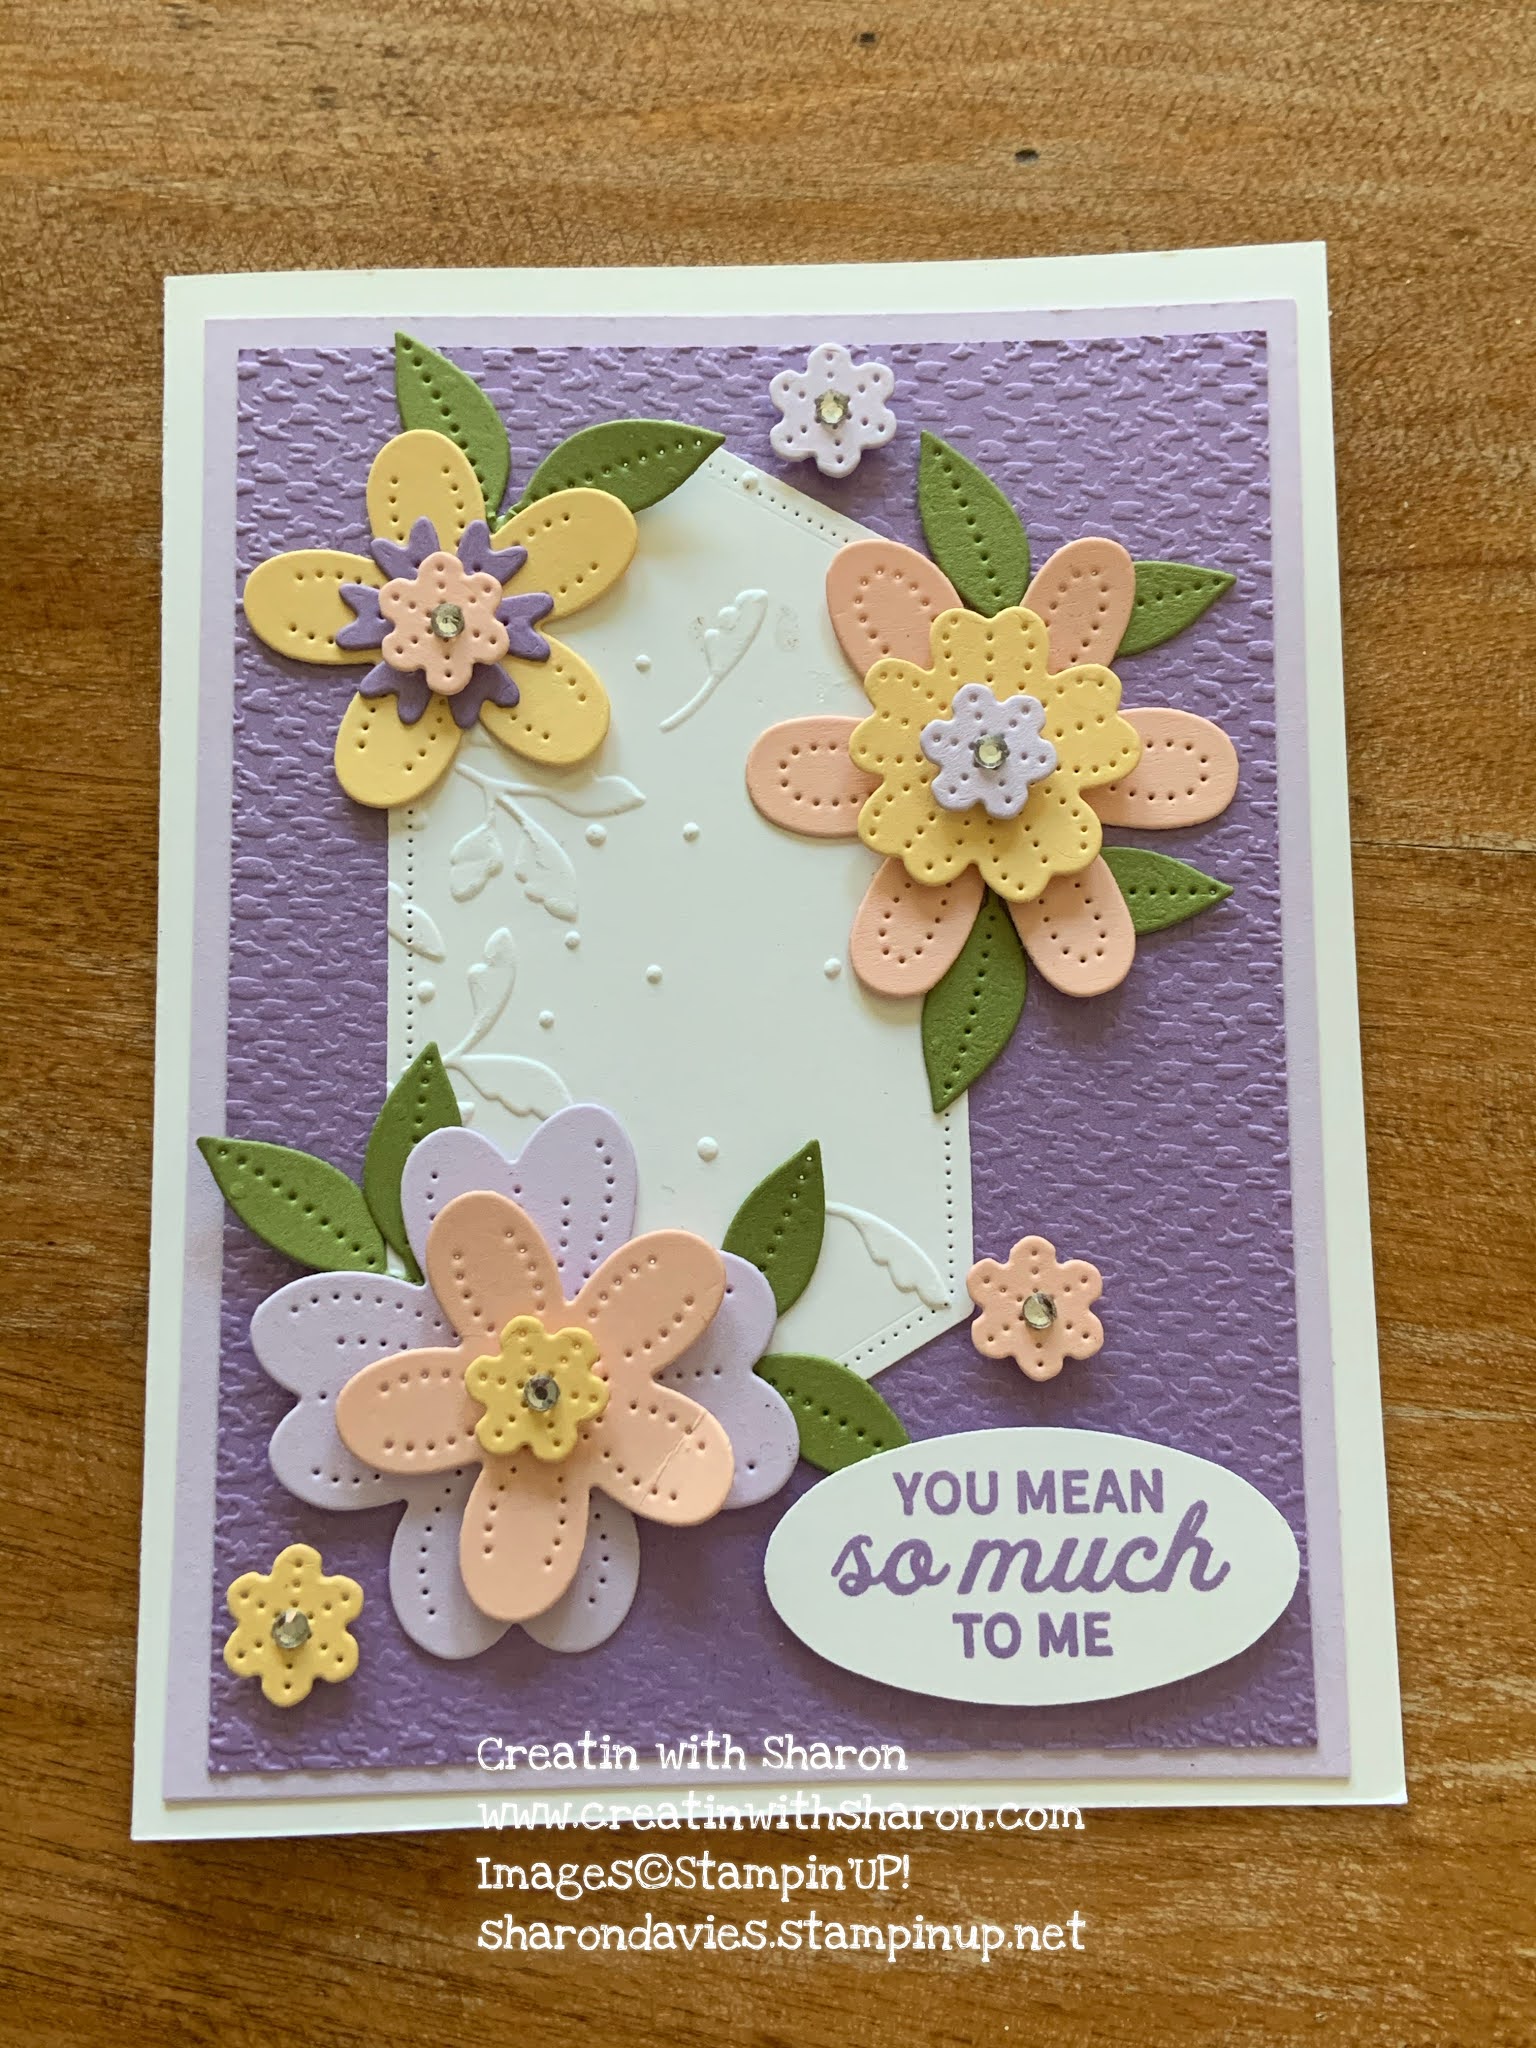
You mean so much to me.


The is the third and final card from my In Bloom card class from  this morning. 

Thinking this one definitely screams SPRING! 

The soft colours are definitely spring to me.  I love all tone of purple. Probably because purple is one of my favourite colours. Do you have a favourite colour? If so, what is it? 


Wanting the PDF for all three In Bloom cards?
                                Hit that shop button above and place an order of $40 in product 
                                                               using this Hostess Code QSBSWUGH
                                     and I’ll email you the PDF for all three of the In Bloom cards within 24 hours.

A HUGE THANK YOU a for stopping by.

Stay safe and healthy.

Cheers 🍻 
Sharon
XOXO

Product List 
center>

Continue Reading
No comments
Share: