Showing posts with label pool party. Show all posts

Monday, 14 November 2022

Week 1 of my 12 Weeks of Christmas


Yay! It's that time of the year again.  It's my 12 Weeks of Christmas project tutorials to help you get ready for the Holiday season.  There will be cards, 3D projects plus some tags and bags.  
There'll be projects for every crafter.

Continue Reading
No comments
Share:

Thursday, 14 April 2022

Crane of Fortune

Crane of Fortune

All images © 1990-2022 Stampin’ Up!


Supplies:


• Stamp Sets: Crane of Fortune (157654)
• Card Stock and Paper: Pool Party(122924)Bermuda Bay (131197)Basic White (159276)
• Stamp Pads: Pool Party (147107);Bermuda Bay (147096)Sahara Sand (147117)
• Miscellaneous: Linen Thread (104199);Rhinestone Basic Jewels (144220); Stampin’ Blends Combo Bermuda Bay (154878); Stampin Dimensionals(104430)Stampin’ Seal Adhesive (152813)


Measurements:


• Pool Party: 8 1/2” x 5 1/2” Base
• Bermuda Bay: 4 ¼” x 2 ¾”
• Basic White4” x 3”; 5 ¼” x 4” for inside
• Linen Thread  16” to wrap and 12” to tie double bow


Instructions:


1. Score and fold base on the long side at 4 ¼”
2. Using Pool Party ink, stamp the large flower image two times along the right side of card front; and once in the bottom right corner of the inside Basic White layer.
3. Using Bermuda Bay ink, stamp the two dragonfly duos three times as shown on the card front; and once on the flower on the inside layer.
4. Stamp the Crane to the right side of the smaller Basic White layer using the Sahara Sand ink; then stamp the sentiment to the left of it with Bermuda Bay.  Layer this layer on the Bermuda Bay layer centering side to side; but leaving an even border on the left and the white hanging over on the right side.
5. Adhering the Linen Thread on the back wrap it three times around these; then tie a double bow with the 12” of Linen Thread and adhere to front as shown.
6. Pop this entire layer up on the base with Stampin’ Dimensionals over to the left side and nearer the bottom so Dragonflies show.
7. Color 5 small Rhinestone Basic Jewels with one of the Bermuda Bay Stampin’ Blends and add them to the cardfront.  
8. Place the larger stamped white layer centered on the inside to write on.


Continue Reading
No comments
Share:

Tuesday, 1 March 2022

Saturday, 5 February 2022

Honeybee Home

Honeybee Home

All images © 1990-2022 Stampin’ Up!®


Supplies:


• Stamp Sets: Honeybee Home (157943) or discounted as a bundle with the Honeybee Blooms Dies (157952)
• Card Stock and Paper: Basic White (159276)Basic Black (121045)Pool Party (122924); Polished Pink (155710)
• Stamp Pads: Tuxedo Black Memento Ink Pad (132708)
• Tools: Stitched Rectangles Dies (151820); Hive 3D Embossing Folder (157955); Stampin’ Cut & Emboss Machine (149653); Bone Folder (102300); Paper Snips (103579); Paper Trimmer (152392)
• Miscellaneous: Daffodil Delight Stampin’ Blends Combo Pack (154883); Pool Party Stampin’ Blends Combo Pack (154894); Old Olive Stampin’ Blends Combo Pack (154892); Polished Pink Stampin’ Blends Combo Pack (155520); Iridescent Rhinestone Basic Jewels (158130); Bumblebee Trinkets (155568); Stampin’ Dimensionals(104430)Mini Stampin’ Dimensionals (255209); Stampin’ Seal Adhesive (152813)Mini Glue Dots (103683)


Measurements:


• Polished Pink: 5 ½” x 8 ½”, scored at 4 ¼”
• Basic Black: 3 ¾” x 5”
• Pool Party3 ¾” x 5”
• Basic White: 4” x 5 ¼”; 2” x 3 ¾”; scrap


Instructions:


1. Fold card base and attach Basic Black piece to card front.
2. Using Hive 3D embossing folder, emboss Pool Party piece.  NOTE:  This piece was cut large because of the embossing process changes its’ size but not uniformly.  Once embossed, trim down to 3 5/8” x 4 7/8”. Attach to card front.
3. Cut 2” x 3 ¾” Basic White piece using Stitched Rectangle die.  Using Tuxedo Black Memento ink, stamp flower in center.  Color using light and dark Polished Pink Blends markers and the light and dark Old Olive Blends markers.  Attach to card front using Dimensionals.
4. Using Black Memento ink, stamp left-facing and right-facing bees on Basic White scrap.  Die cut.  Color using light Daffodil Delight and light Pool Party Blends markers.  Attach to card front using Mini Dimensionals.
5. Attach one large and one small Iridescent Rhinestone to front of card.
6. Inside of card:  Using Tuxedo Black Memento ink, stamp sentiment and flower on 4” x 5 ¼” Basic White piece.  Color flowers using light and dark Polished Pink Blends markers and the light and dark Old Olive Blends markers.  Attach piece to inside of card.
7. Attach one bumblebee trinket using Mini Glue Dot.


Continue Reading
No comments
Share:

Wednesday, 29 December 2021

Friendly Hello

Friendly Hello

All images © 1990-2021 Stampin’ Up!®


Supplies:


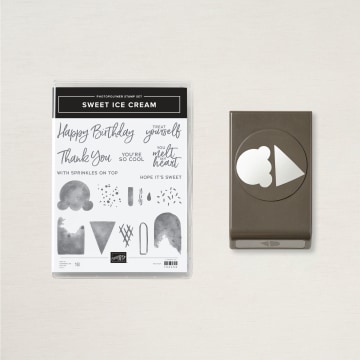
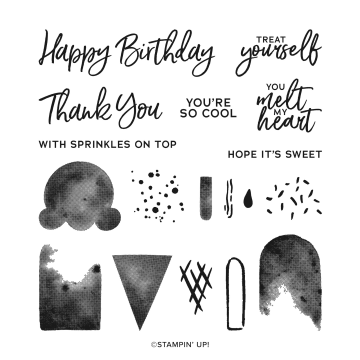
• Stamp Sets: Friendly Hello (158075)
• Card Stock and Paper: Pool Party (122924); Basic White (159276)Basic Black (121045)Friendly Hello Designers  Series Paper (DSP) (158125)
• Stamp Pads: Pool Party Ink (147107);Petal Pink Ink (147108); Granny Apple Green Ink (147095); Versamark Ink (102283)
• Tools: Stitched Rectangles Dies(151820); Heat Tool (129053)Paper Trimmer (152392); Stampin’ Cut & Emboss Machine (149653);
• Miscellaneous: Iridescent Rhinestones Basic Jewels (158130); Stampin’Dimensionals (104430)Multipurpose Liquid Glue (110755); Basics Stampin’ Emboss Powder (155554)


Measurements:


• Pool Party Card Base: ¼” x 11”, scored at 5 1/2
• Pool Party: 2 ¾” x 4 1/4”
• Basic White2 ½” x 4”4“x 5 ½”
• DSP: 2 ½ “x 4” 
• Basic Black: 2“x 3”


Instructions:


1. Measure and score your card base. Cut off 2 ¾ “off the front which then creates the Pool Party 2 ¾” x 4 1/4” piece. 
2. Die cut in your Stampin’ Cut & Emboss Machine the Basic Black with the Stitched Rectangles. If you don’t have these dies you can cut the Basic Black into a 1” x 2 3/8” size.
3. On the Basic Black Stitched Rectangle use the Versamark Ink, White Stampin’ Emboss Powder, and the Heat Tool to create the saying. Ink up with the stamp with Versamark and stamp onto the Basic Black. Right away sprinkle on the White Stampin’ Emboss Powder to cover the inked greeting. Tap off the excess (carefully pour that back into the container) and apply heat to it with the Heat Tool until the powder melts. Could take 10-30 seconds. 
4. Stamp onto the 2 1/2” x 4” Basic White the two flowers image in Pool Party Ink. Stamp in Granny Apple Green Ink the leaves around the flowers. Stamp in Petal Pink Ink the 3 buds once and use the splatter stamp all around the flowers and leaves. Glue with Multipurpose Liquid Glue to the Pool Party 2 ¾” x 4 ¼” piece of cardstock. 
5. Glue the DSP to the front of the card base and glue the other DSP to the 4” x 5 ¼ Basic White on the right side. Attach the Basic White to the inside of the card. 
6. Using Stampin’ Dimensionals on the back of the left side of the stamped floral image attach to the card base front. 
7. Using Stampin’ Dimensionals attach the Basic Black Stitched Rectangle. 
8. Embellish with 3 of the Iridescent Rhinestones Basic Jewels. 


Continue Reading
No comments
Share:

Monday, 8 March 2021

Ice Cream Corner Suite

The Annual Catalogue Inspiration 
  Ice Cream Corner Suite Sprinkle beautiful colours together with sweet images, add a hint of nostalgia, and you've created the perfect recipe for the Ice Cream Corner Suite! Whether you are sending sweet thoughts and birthday wishes or creating cool summer memories, this coordinating two-step stamp set and punch bundle are a must-have combo. From kids to the young-at-heart you'll create smiles with every project you make. The bright, fun Ice Cream Corner Designer Series Paper adds the perfect backdrop for the ice cream cones and popsicle images, but it also coordinates so you can punch swirly ice cream scoops and waffle cones with or without stamping. Add in the Ice Cream Corner sprinkles as embellishments or for shaker cards, and a pinch of BlackBerry Bliss Striped Ribbon to top off you ice cream creations in style! The tutorial below features the Ice Cream Corner Suite combined with an ombre background, sweet details, and scrumptious colours. This cool card will melt hearts, but won't melt in the mail! Cheers

Sharon Davies
Your Independent Stampin’UP!  Demonstrator 
-------------------------------------------------- Ice Cream Corner Ombre Card Ice Cream Corner Ombre Card Join my Email Newsletter List and receive my tutorials by email. With each mailing you will receive a picture of the finished project, a supply list, card layout, and a step-by-step tutorial.

SUPPLIES:

STAMPS Sweet Ice Cream Photopolymer stamp set (#154456) PAPER Pool Party (#122924), Thick Basic White (#159229), Ice Cream Corner Designer Series Paper (#154567) INK Blackberry Bliss Pad (#147092), Terracotta Tile (#150086), Bermuda Bay (#147096), Pool Party (#147107), VersaMark Pad (#102283) ADHESIVES Stampin’ Dimensionals (#104430), Multipurpose Liquid Glue (#110755), Stampin' SEAL (#152813) TOOLS Paper Snips (#103579), Rectangle Stitched Dies (#151820), Blending Brushes (#153611), Ice Cream Cone Builder Punch (#154241), Heat Tool (#129053) EMBELLISHMENTS White Stampin’ Emboss Powder (#109132)

Coordinating Products

January-June Mini Catalogue - Ice Cream Corner Suite January-June Mini Catalogue - Ice Cream Corner Suite January-June Mini Catalogue - Ice Cream Corner Suite January-June Mini Catalogue - Ice Cream Corner Suite January-June Mini Catalogue - Ice Cream Corner Suite January-June Mini Catalogue - Ice Cream Corner Suite January-June Mini Catalogue - Ice Cream Corner Suite Ice Cream Corner Suite ORDER SUPPLIES ONLINE DOWNLOAD OUR LATEST CATALOGUE January - June Mini Catalogue

Continue Reading
No comments
Share: