Showing posts with label thanks. Show all posts

Monday, 21 March 2022

For the Record

For the Record Card

All images © 1990-2021 Stampin’ Up!®


Supplies:


• Stamp Sets: For the Record (158066)
• Card Stock and Paper:Basic White Thick (159229); Basic White (159276); Basic Black (121045); Coastal Cabana (131297)
• Stamp Pads: Coastal Cabana (147097);Polished Pink (155712); Tuxedo Black Memento (132708)
• Tools: Amazing Thanks Dies (157816)
• Miscellaneous: 2021-23 In Color Jewels (155571); Foam Adhesive Strips (141825)Stampin’ Dimensionals (104430)Stampin’ Seal Adhesive (152813)


Measurements:


• Basic White Thick: 8 1/2” x 5 1/2”
• Basic White: 4 ¾” x 3 ½”
• Basic Black: 5” x 3 ¾”, plus scraps
• Coastal Cabana: 4 7/8” x 3 5/8”


Instructions:


1. Score Basic White cardstock in half on long side and fold on score line.
2. Adhere Basic Black cardstock to card front using Dimensionals.
3. Adhere Coastal Cabana cardstock to card front using Dimensionals.
4. Stamp record player using Coastal Cabana, Tuxedo Black Memento, and Polished Pink Inks.
5. Place “thanks” die on stamped cardstock as shown, and die cut skinnier word thanks.
6. Adhere white cardstock that has “thanks” die cut out of it to card front.
7. Die cut Basic Black “thanks” die (larger outline die)  and adhere to card front using Foam Adhesive Strips to give it a pop.
8. Adhere white die cut “thanks” to black outline “thanks” on card front.
9. Adhere 2 In Color Jewels to center of record player.

Continue Reading
No comments
Share:

Wednesday, 1 July 2020

love and thanks


Love and Thank
Oh my I love theses three colours together. Such an elegant colour combinations. 
Don’t you think? I just pulled out my Prized Peony Bundle and I’m loving it. 
Such a versatile stamp you can colour the Peony’s any colour you wish. 
And of course I did a nontraditional color. Thinking this combination to make a beautiful wedding card.What do you think of the colour combination?


The bits and bobs for this card. 
Card base 8 1/2”x 5 1/2” scored on the long side at 4 1/4”
The next piece is 5 1/4” x 4”. With your White Craft ink stamp the images form the stamp set. 
The stripe of Very Vanilla is  4”x 2 1/2” and I the edges are cut with the scalloped dies form the bundle. And then embossed with the Tasteful Textures embossing folder. 
Your image is stamped on a piece of Very Vanilla that is 2 3/4”x 2 3/4”
Once you’ve stamp your image colour with your blends. 
The Basic Black is 3”x 3”
Your sentiment is stamped on a piece of card stock that is 3/4”x 2 1/2”
And the Black it 1” x 3”
And punch them out with your Lovely  Labels Pick a Punch. 
Now you can assemble. 
Be sure to add a little bling. I colour my Peony with Wink of Stella. 

Thanks for stopping by and have a wonderful week. 
Cheers 
Sharon


Continue Reading
No comments
Share:

Monday, 25 March 2019

Tropical Chic

Tropical Chic Bundle

I wasn't to keen on this bundle when I first saw it. I thought, why would I spend so much cash on this Bundle. What can I do with it. Then I started seeing different cards make with this bundle. I don't know about you but I start waking up in the middle of the night with different ideas running through my mind. I was like I really need this set. 


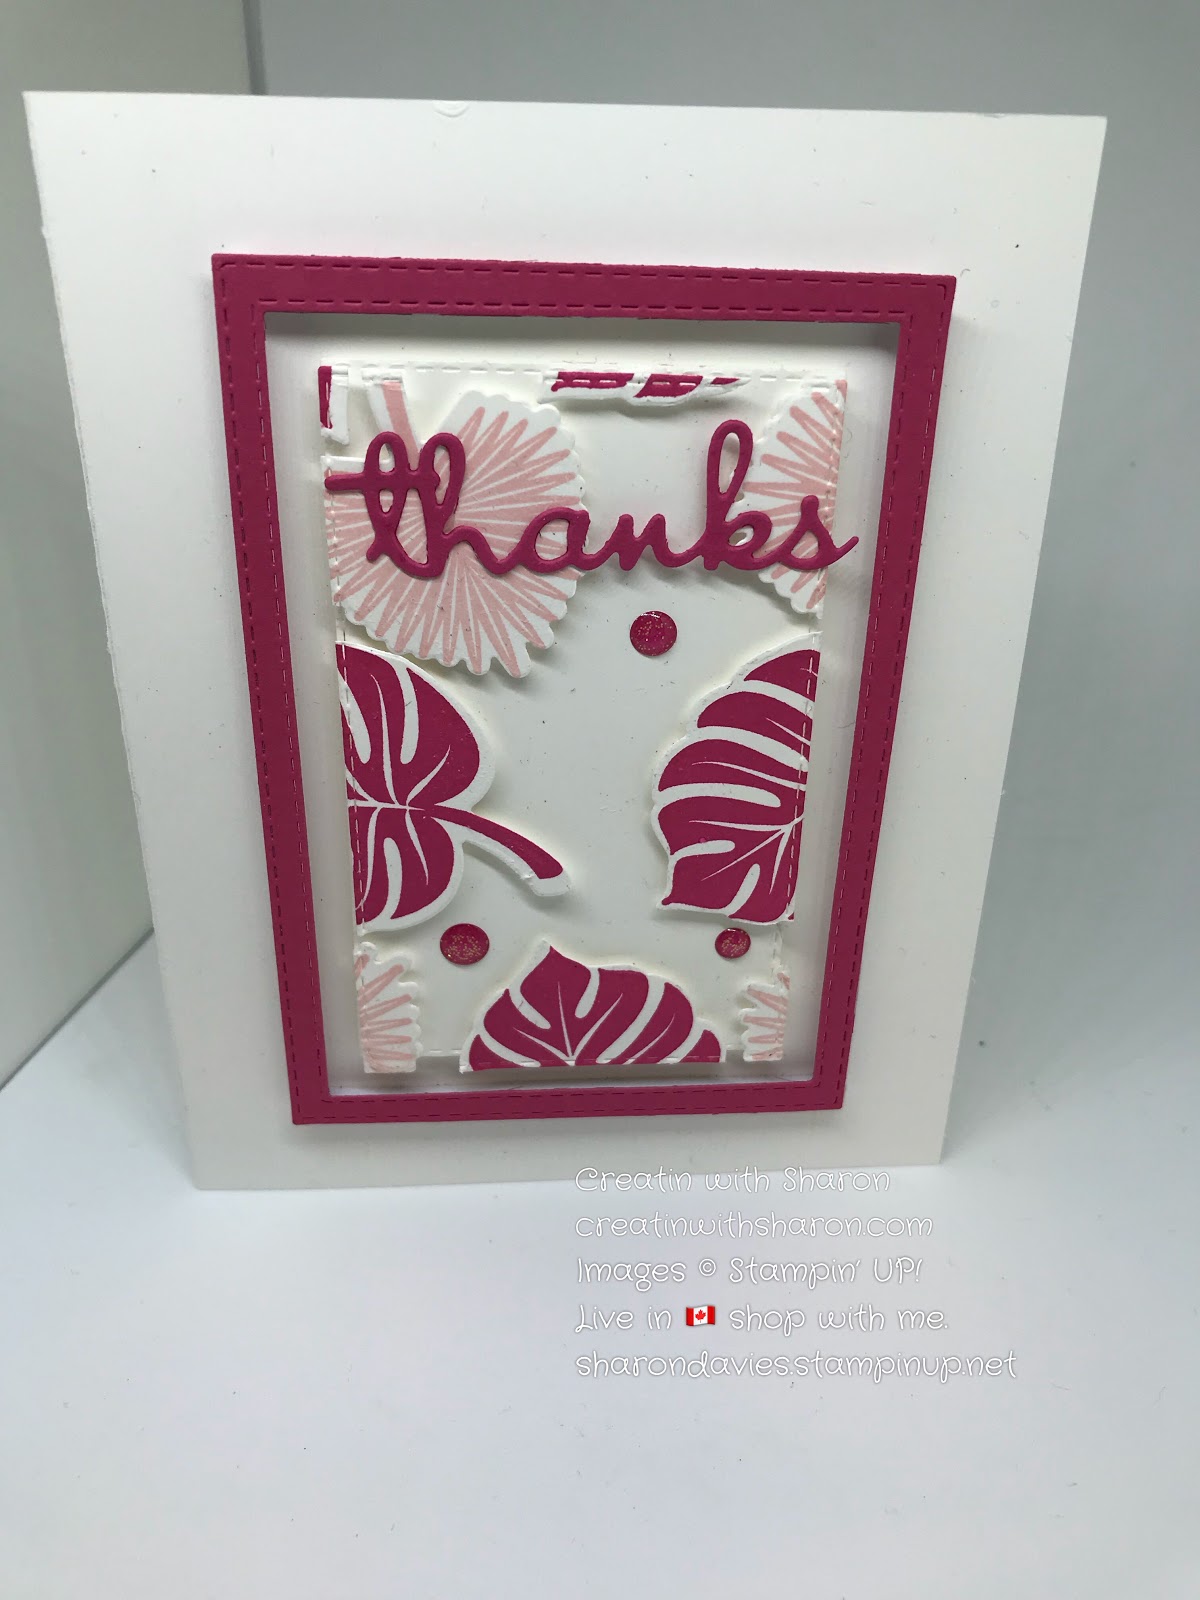
Aren't you loving the colours combo! I just loving the pinks and gold. What        a classic colour combo.  This technique is called The Floating Die. And is an easy technique. Before you get started you’ll need some Press ‘n Seal. You can pick it up at any grocery store. So here we go. You’ll need a card base 5 1/2” x 8.1/2 scored at 4 1/4” on the 8 1/2 side. Now you want to stamped the leaves on a whisper white card stock using the pink inks. Then cut them out with the matching dies. I arranged them on whisper white card stock(that is 3”x4”). 
With a piece of Press 'n Seal place on the top of the cut pieces.
With one of the dies from the Rectangle Stitched Framelits. Place on top of the leaves and run through your Big Shot.
Once you run it though your Big shot slowly remove the Press ‘n Seal from the base. Leaving the leaves on the Press ‘n Seal. Now take your dimensionals and place them on the backside of your leaves. Remove the backings from your dimensionals. Take the Press ‘n Seal with the leaves and adhere back onto the whisper white piece placing it carefully. Now slowly remove the Press ‘n Seal from your flowers. I used my piercing tool to remove it. 
Here’s my YouTube video. Enjoy! 
https://www.youtube.com/watch?v=iSQ3dgI6p9k&t=29s


Product List
Statement Of My Heart Stamp Set
[148108]

Continue Reading
No comments
Share:

Tuesday, 12 June 2018

CASE-ing Tuesday #151


CASE-ing Tuesday #151
Here’s my take on this weeks card. 
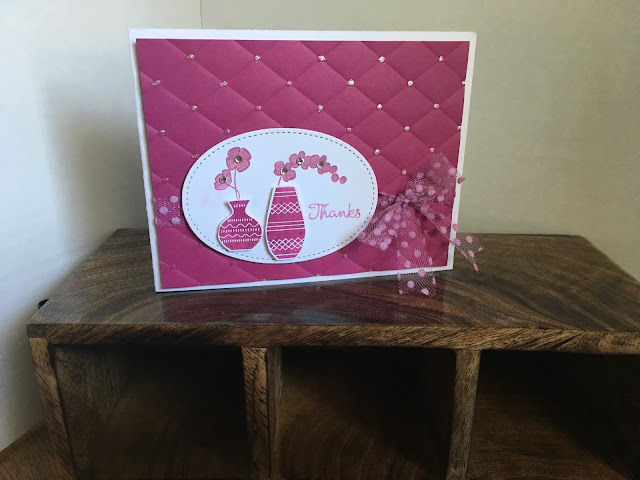
Totally loving the Tufted embossing folder. It adds so much detail. I was going to use Rhinestones to add a bit of bling but that would of been a lot of rhinestones. So I  improvised by using the Wink of Stella. Love how it turned out. .


It was such a fast and easy card. The Blends are wonderful to colour ribbon to match your paper. I just took the Blends and ran it over the ribbon to give it a bit of colour. 
Thanks for stopping by. 


Continue Reading
No comments
Share: