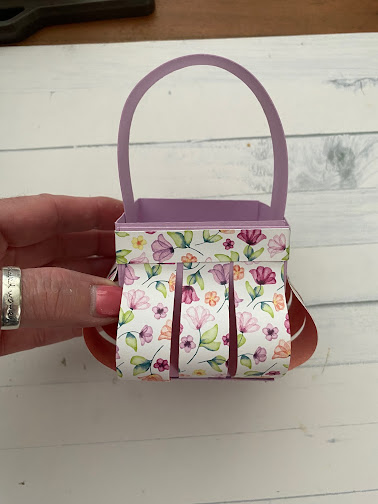
Since the class was between Good Friday and Easter Sunday I thought they would make the perfect pillow gift. I did fill them with chocolate eggs, a couple chocolate bunnies and a carrot.
I also like to spoil the attendees with a little treat so I made everyone a Rice Crispy Birds Nest.
INSTRUCTIONS:
Product List
- Cut Fresh Freesia Cardstock to 7-1⁄2” x 7-1⁄2”. Score one side at 2-1⁄2” and 5. Turn paper clockwise, then score again at 2-1⁄2” and 5”. Cut into scorelines up to middle section, add adhesive to corner sections and assemble basket base.
- Cut 12” strips of Designer Series Paper to 3⁄4” x 3”. Score 1⁄2 along the bottom. Add adhesives to the ends, then adhere to basket base with the strips slightly bending.
- Cut Fresh Freesia Cardstock to 2-1⁄2” x 2-1⁄2” and adhere to the bottom.
- Cut Fresh Freesia Cardstock to 1⁄2” x 8-1⁄2”, add adhesive to both ends and glue to the outside of the basket.
- Cut Designer Series Paper to 12” x 1⁄2”, add adhesive to the full length and adhere around the top edge of the basket.
- Die-cut 2 intricate flowers from Basic White Cardstock with Thoughtful Expressions Dies and adhere one to each side of the basket.
- Embellish basket with Pastel Sequins.


.jpeg)

.jpeg)


No comments:
Post a Comment