

The Festive Friends Bundle is the perfect pair for your holiday crafting. It features classic holiday icons like Santa, a snowman, pine trees, and more. Create adorable scenes with the perfectly sized Christmas characters and use the detailed dies to build festive backdrops.
Stamp your way to a merry little Christmas with this festive duo.All images © 1990-2025 Stampin’ Up!®
Festive Friends Bundle

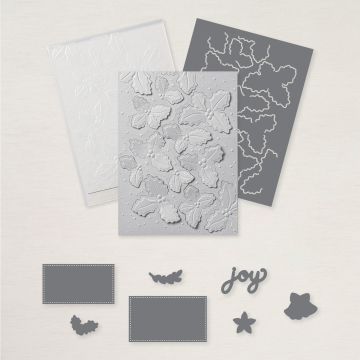
Jolly Holly Hybrid Embossing Folder
Measurements:
Cardstock:Thick Basic White: 10 ½” x 5 ½” (See Scoring and Cutting Below)
Basic White: 2nd Largest Stylish Shape Circle, Panel for Message 2 ¾” x 4 ¼”
Old Olive: Embossed Panel in Jolly Holly 3D Hybrid Embossing Folder 3 ¼
x 5 ¼”, Largest Stylish Shape Circle in Old Olive
Old Olive: Embossed Panel in Jolly Holly 3D Hybrid Embossing Folder 3 ¼
x 5 ¼”, Largest Stylish Shape Circle in Old Olive
Designer Series Paper:
Gathering Together: (2) 1 ½” x 5 ¼”, (4) 1 ½” x 2” and (2) 7/8” x 1 5/8”
Instructions:
- Along the 10 ½” side of card stock score at 1 ¾”, 3 ½”, 5 ¼” – turn to other side and score at 3 ½” again.
- Along the 5 ½” side (with 1 ½” rows at the top) line up cardstock at 2 ¼” and cut from first score line down to 3rd score line.
- Flip over and repeat, line up at 2 ¼” mark and cut from 1st score line down to 3rd score line.
- Stamp sentiment on message panel in Real Red ink.
- Add Multipurpose Liquid Glue along top, left side, and bottom side only of Old Olive embossed panel leaving room to slide secret message in.
- Adhere DSP strip to cardbase.
- Stamp Elf in Tuxedo Black Memento in and colour him with the colours listed above.
- Die cut elf out and tree in Old Olive.
- Adhere tree down first, then elf with Stampin’ Dimensionals.
- Adhere only half of circle to the front on the card base to allow opening of card.
![Festive Friends Bundle (English) [ 166039 ]](https://assets1.tamsnetwork.com/images/EC042017NF/166039s.jpg "Festive Friends Bundle (English) [ 166039 ]") |  |  | ||
 | ||||
 |  | |||
 |  |

 Specialty Designer Series Paper")
")


.jpeg)
.jpeg)


No comments:
Post a Comment