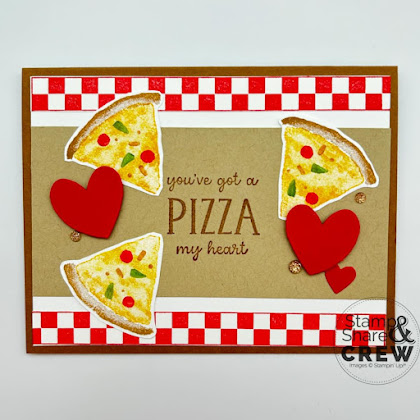
Thank you for your interest in my FREE Tutorial. I hope you enjoy making this cute project.
All images © 1990-2024 Stampin’ Up!®
Watercolor Melon Stamp Set
Supremely Awesome Stamp Set
Cheers 🍻
Sharon
Measurements:
Pecan Pie card stock - 8 ½” x 5 ½”
Basic White card stock - 5 ¼” x 4” layer and 2” x 5” for pizza
Crumb Cake card stock - 2 ½” x 5 ¼” layer
Real Red card stock - 2” x 2 ½” for hearts
Instructions:
- Score Pecan Pie card base on the long side at 4 ¼” and fold.
- Stamp the checkered strip on the top and bottom of the Basic White layer in Real Red ink. Attach to the card front using Stampin’ Seal.
- Stamp the sentiment using Pecan Pie ink on the Crumb Cake layer. Attach to the card front using Stampin Seal.
- Stamp three watermelon wedges using Crushed Curry ink on Basic White card stock. Then stamp the rind on each wedge for the pizza crust using Pecan Pie ink. Hand cut each piece of pizza using your paper snips.
- For the 'toppings', use your markers to colour the sprinkles image in the Ice Cream Swirl stamp set using Real Red (for pepperoni), Garden Green (for green peppers) and Pecan Pie (for sausage or bacon crumbles). Then, huff on the stamp and stamp one time on each slice recoloring for each one. Add the slices of pizza to the card front as shown using Multipurpose Liquid Glue.
- Punch three hearts using Real Red card stock and the Bee Builder Punch. Add the two larger hearts using Stampin’ Dimensionals and the small heart with Multipurpose Liquid Glue.
- Add three Gems to the card front to finish.


.jpeg)

.jpeg)


No comments:
Post a Comment