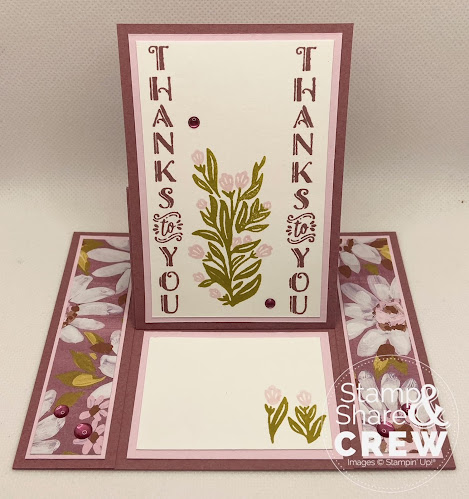
The Vertical Blooms stamp set allows you to add sentiments as borders and as a vertical design element. Together with the Daisy DSP you can make this very pretty card.
Measurements:
Moody Mauve card stock: 5 1/2" x 8 1/2", scored at 4 1/4" and a piece 3" x 4 1/4"
Basic White card stock: 2 1/2" x 3 7/8" and 2 1/2" x 1 3/4"
Bubble Bath card stock: 1" x 4" (2 pieces), 2 3/4" x 4 1/8" and 2 3/4" x 2"
Fresh As A Daisy DSP: 7/8" x 3 7/8" (2 pieces)
Instructions:
- Measure 1 ¼” in from the left and right sides of the front panel of the card and slice between the bottom and the score line to create 3 panels.
- Turn card front 90 degrees in trimmer and SCORE center panel at 2 1/8” from the bottom.
- Glue the two 1 ¼” panels down to the card base.
- Glue DSP pieces to the Bubble Bath 1” x 4” pieces and attach to the side panels.
- Using Moody Mauve ink, stamp 'Thanks to You' on the far left and far right of the 2 ½” x 3 7/8” Basic White piece and stamp the plant leaves between them using the Wild Wheat ink.
- Using Bubble Bath ink, stamp flowers, lining them up with the plant leaves.
- Attach this piece to the 2 ¾” x 4 1/8” Bubble Bath piece and then to the 3” x 4 ¼” Moody Mauve piece. Attach the Moody Mauve piece to the middle flap on the card BELOW the score line only. Bend on score line to create easel.
- Stamp leaf duo and tiny flower duo on the 2 ½” x 1 ¾” Basic White piece in the bottom right. Attach this piece to the 2 ¾” x 2” Bubble Bath piece. Finally, attach to inside of card at the bottom.
- Attach Dots as desired.


.jpeg)

.jpeg)


No comments:
Post a Comment