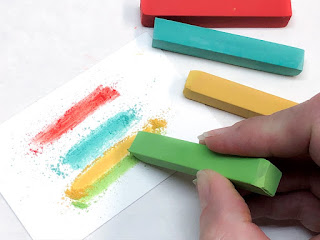
So I pulled out the new Soft Pastels to make this card.
And loving the out coming.
But before we get started here’s the
BITS and BOBS for this card
Base-8.5”x5.5” scored on the long side at 4.25”
First layer is 5.25” x4”
Second is 5”x3.75. This is the the piece you’ll do your embossing and colouring on.
This was a fun card to make. A little heat embossing and colouring.
I stamped the Sunflower image with Versa Marker and sprinkled with the white embossing powder.
And set the powder using my heat tool.
Now the fun begins.
I coloured the Sunflowers using the Mango Melody pastel and the leaves were done with the Mossy Meadow pastel.
I coloured all over the flower with the pastel then with my painter did a little blending.
You want to do the same thing with your leave.
On scrap cardstock colour swatches of Poppy Parade, Coastal Cabana and Mango Melody Soft Pastels until you build up some pastel dust of each colour.
Carefully lift the cardstock with the pastel dust. Tip it slightly over the embossed layer and sprinkle dust around the sheet. Mostly aim for the blank area on top and try to avoid the full flower at the top right that will be coloured later. Tap the cardstock to loosen the dust if needed.
Cover the dusted cardstock with scrap paper. Hold the paper still and use a small stamp block to press the pastel dust into the cardstock with firm circular motions. Press all over the cardstock.
(TIP: a light spritz of cheap aerosol hairspray can be used to set the pastel and reduce smudging.)
With a scrape piece Basic White card stock you want to stamp your sentiment with Versa Mark. And sprinkle with white embossing powder. Heat with Heat Tool until set.
Rub the flat edge of the Coastal Cabana Soft Pastel over your sentiment.
Cover the whole cardstock piece, but don't worry about it being perfect.
Let’s put everything together.
Your piece of art work will be adhere to the second layer using your liquid glue.
Wrap your art work with a white piece twine about three times. Be sure to have enough to tie a bow to one side.
Add dimensionals to the back side and adhere to the card base.
Hoping you have enjoyed this technique.
I you have any questions please let me know.
Cheers 🍻
Sharon


.jpeg)

.jpeg)


No comments:
Post a Comment