
ART GALLERY THANK YOU
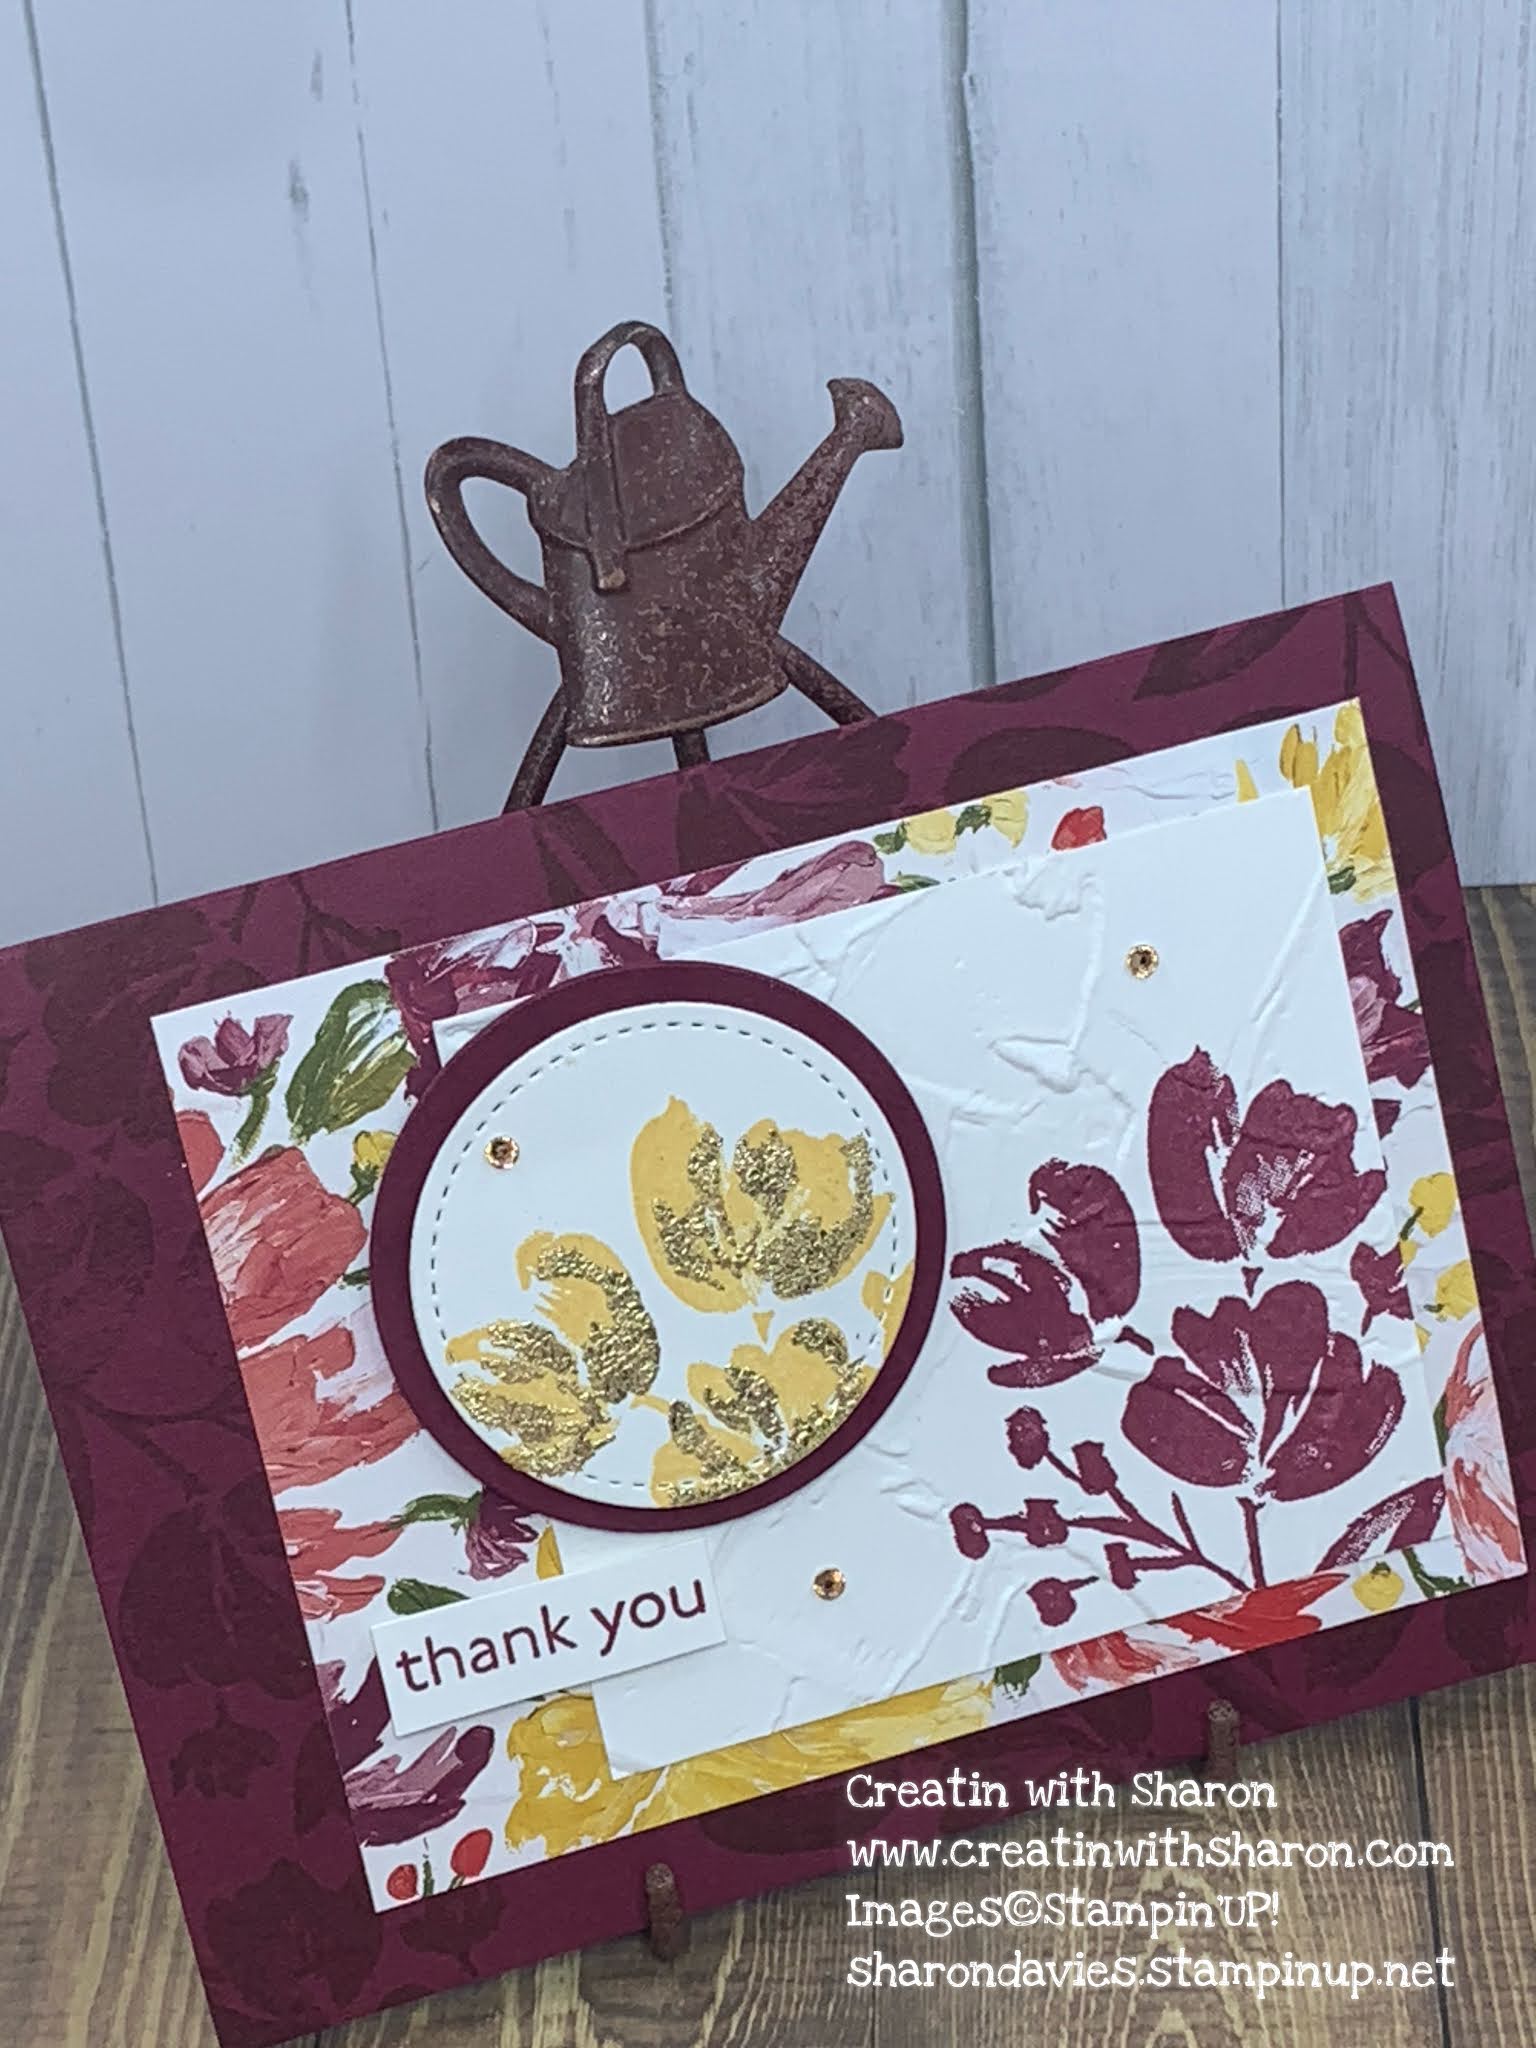
Card base
Merry Merlot 5 ½” x 8 ½”
Scrap piece of Merry Merlot for the Large Circle
Fine Art Floral DSP 4 5/8 ” x 3 1/2” Card outside - first layer
4” x 5 ¼” Card inside- first layer
Basic White 3 3/8” x 3” Card outside - second layer
3 ¾” x 5” Card Inside - second layer
Scrap Small Circle for Sentiment
Assembly Instructions
Card base
1. Fold the card base in half and burnish with your bone folder.
2. Using the Art Gallery Photopolymer Stamp Set and Merry Merlot ink, stamp the card front with a flower stamp of your choice.
3. Stamp the 4 5/8 ” x 3 ½ ” piece of Basic White cardstock with the same stamp. Then insert this piece into the Painted Texture 3D Embossing Folder and run through your Stampin’ Cut and Emboss machine.
4. Adhere the embossed layer onto the 3 3/8” x 3” DSP then adhere to the card front.
5. Using the Layering Circles dies and the 4th largest die, cut out a circle using a scrap of Merry Merlot cardstock.
6. Using the Stitched Shapes Dies and the 2nd smallest circle die,
cut out a circle using a scrap of Basic White cardstock.
7. Stamp the flower image using So Saffron ink.
Then, restamp the flower using VersaMark ink.
8. Apply Heat and Stick Powder to the stamped image and then heat with the Heat Tool.
9. Add the Gilded Leafing using a small but slightly firm paint brush.
Once the image has cooled, gently brush off the gold flakes.
10. Adhere the smaller circle to the larger circle.
Adhere both to the card front using two layers of dimensionals.
11. Stamp the sentiment using Merry Merlot ink and cut around the edge leaving a small border.
Adhere to the card front using Mini Stampin’ Dimensionals.
12. And for some bling! Add 3 Champagne Rhinestones Basic Jewels to the card front.
Card Inside

1. Stamp the 3 ¾” x 5”Basic White cardstock using a flower stamp then adhere this layer to the DSP. Adhere both layers to the inside of the card.
These are the Stampin’ Up! products I used for this project:
 |  |  | ||
 |  |  |  | |
 |  |  |  |
 Designer Series Paper")


.jpeg)
.jpeg)


No comments:
Post a Comment